Smart I/O
It is the panel where you can completely manage the Smart I/O section in the IoT Technologies category. In this panel, you can follow everything from the type to the activation status of the code you have created, and if you wish, you can quickly reset the structure you have created with the I/O reset button just to the left of the delete button. Let's create a new Dracowith theAdd Draco` button.
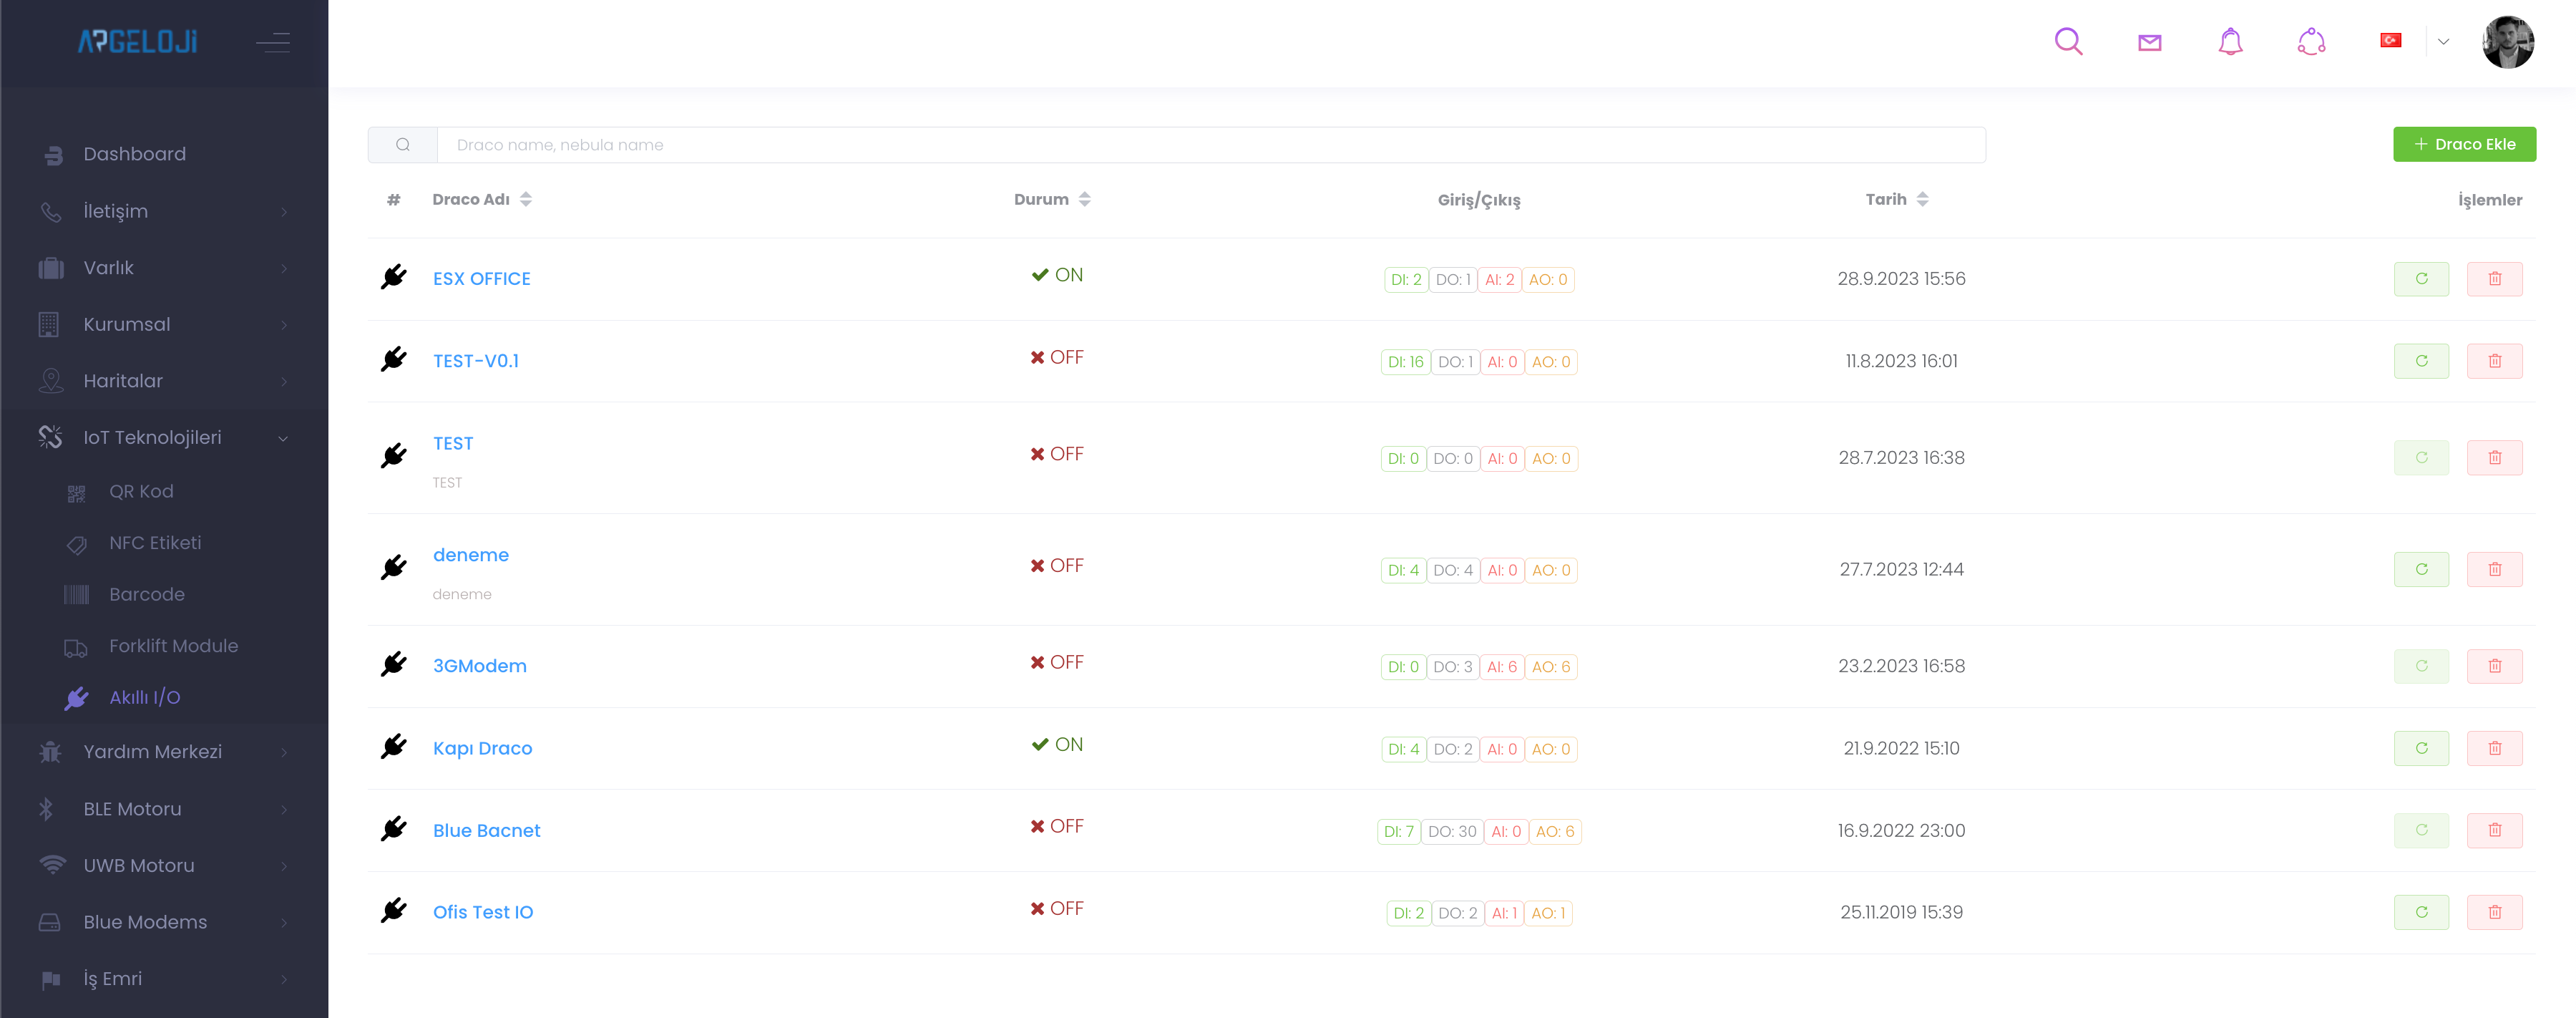
After entering data such as name, description during Draco creation, the most suitable draco model should be selected from the model section.

Let's enter any draco I created on the Smart I/O side. The panel we encounter offers us 15+ customisations. Let's take a look at the `"Network Configuration" button under the description.
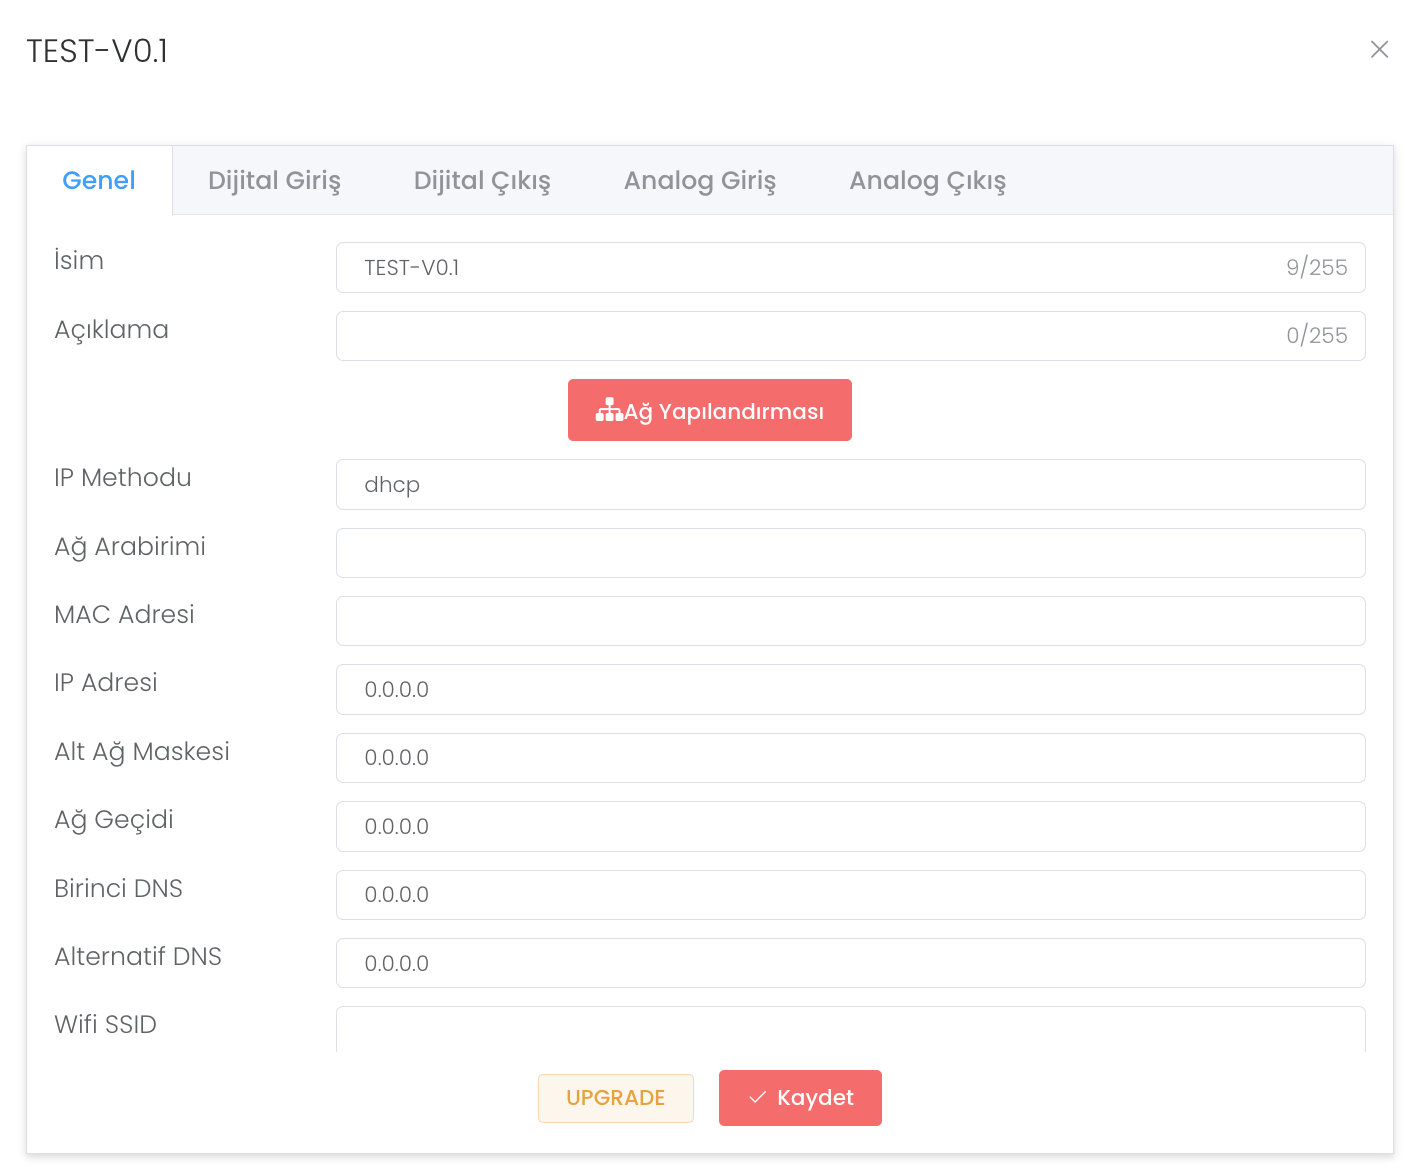
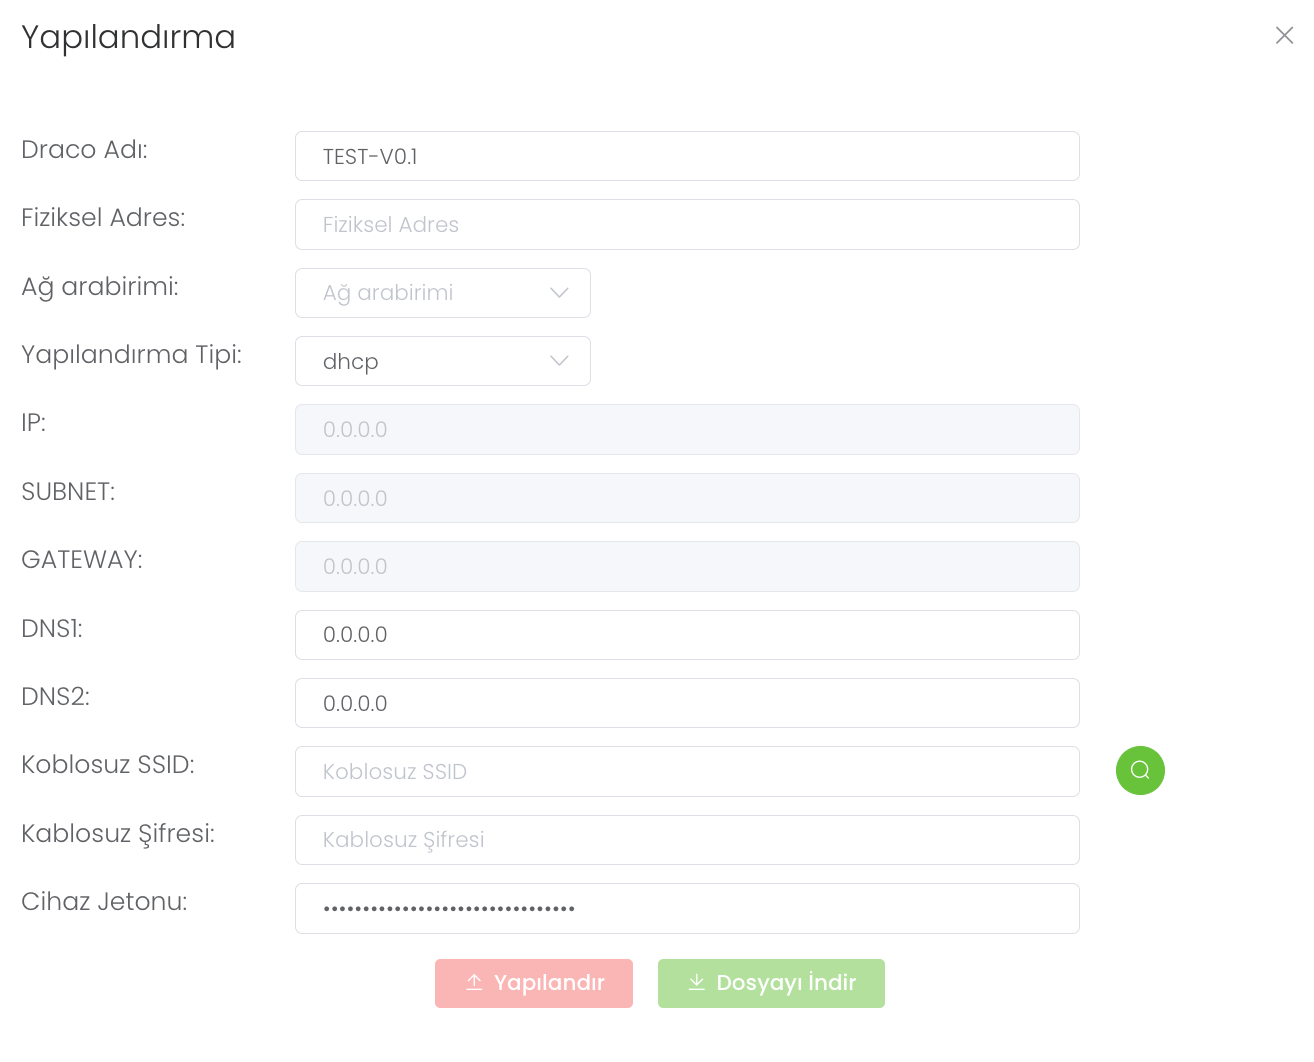
The Network Configuration section provides our dracomuza with this structure where customisations such as network unit, network configuration, dns settings etc. are made.
Now let's take a look at the digital and analogue input-output configuration of the dracon.
It provides a structure that we can follow the value, point and status of the inputs we set in the Digital input section and edit them when we click on them.
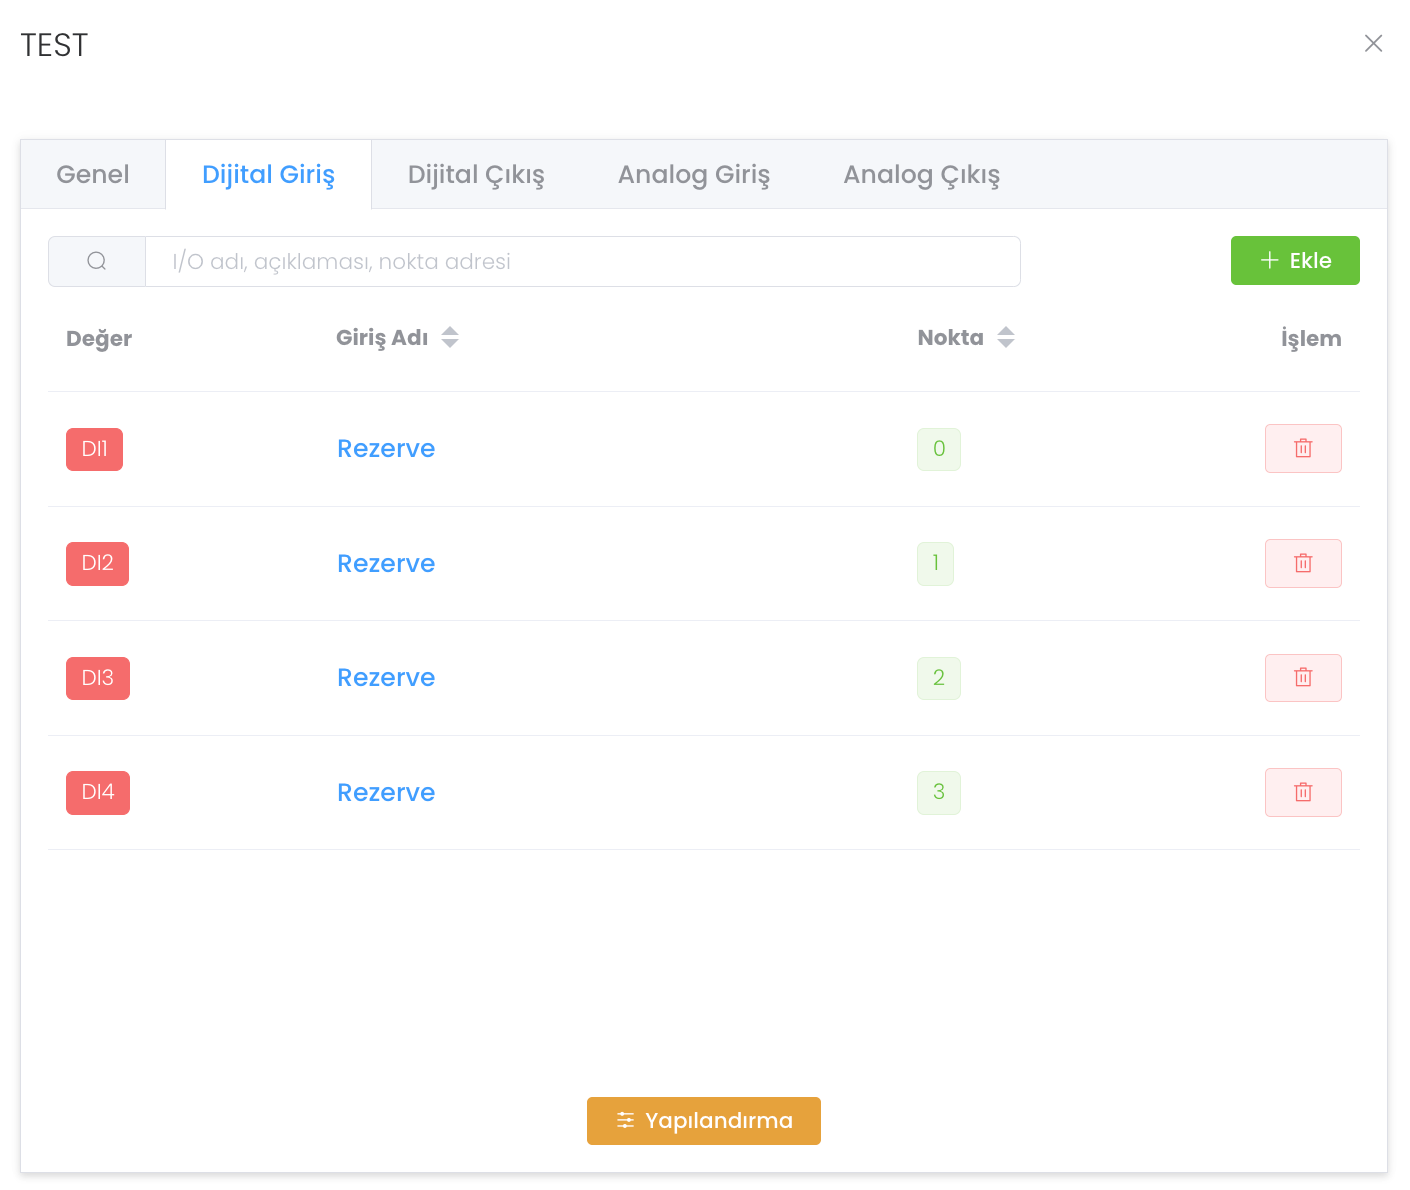
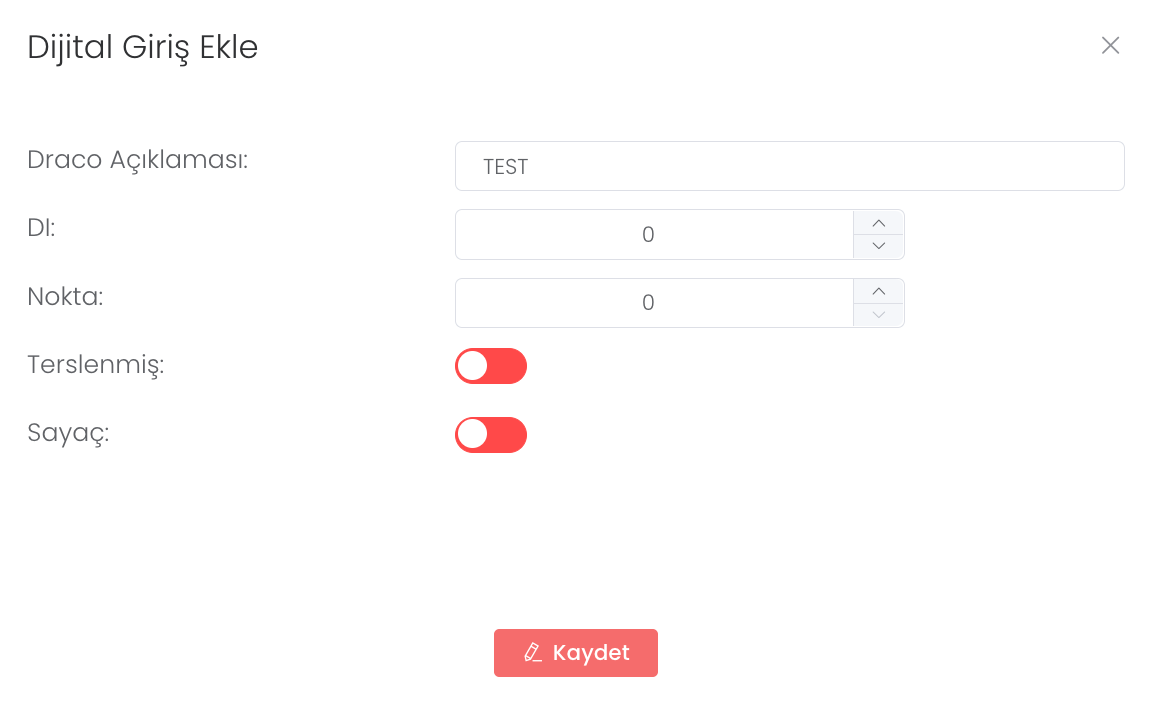
When we press the "Add" button, we come to the "Add Digital Input" panel. After entering data such as Description, point, DI, we specify the features we want to activate, that's it When you press the "Save" button, you will have added a new digital draco input.
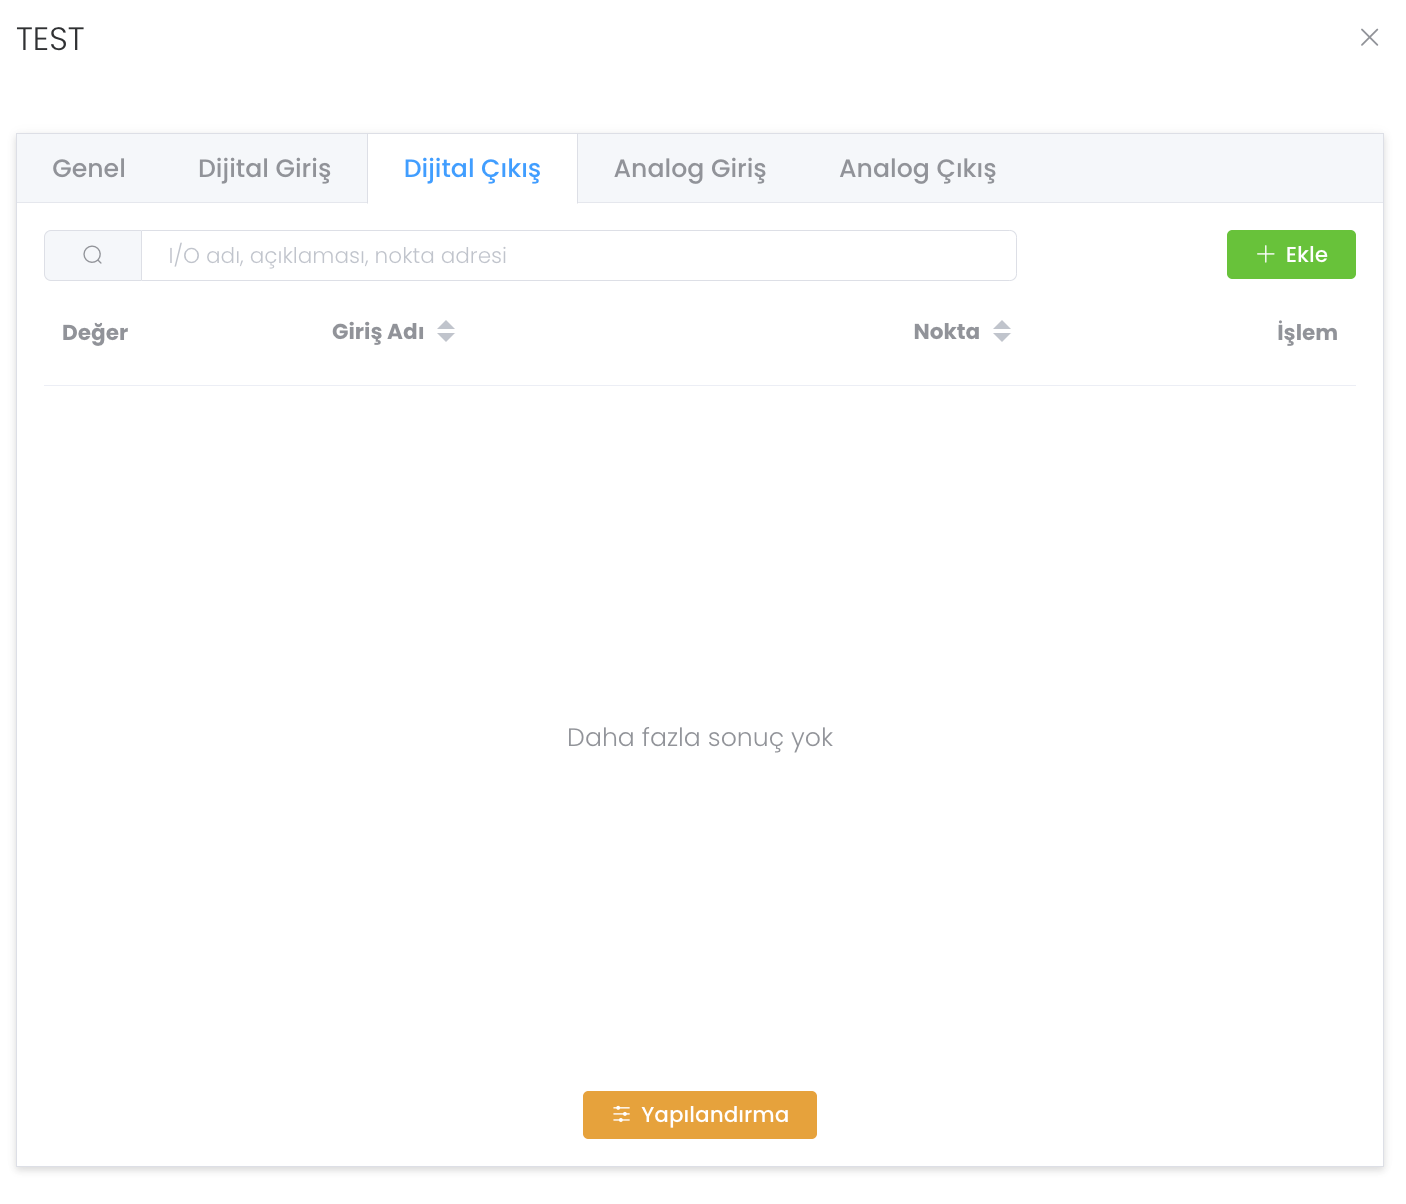
It provides a structure that we can edit if we follow the value, point and status of the inputs we set in the Digital output section and click on it.
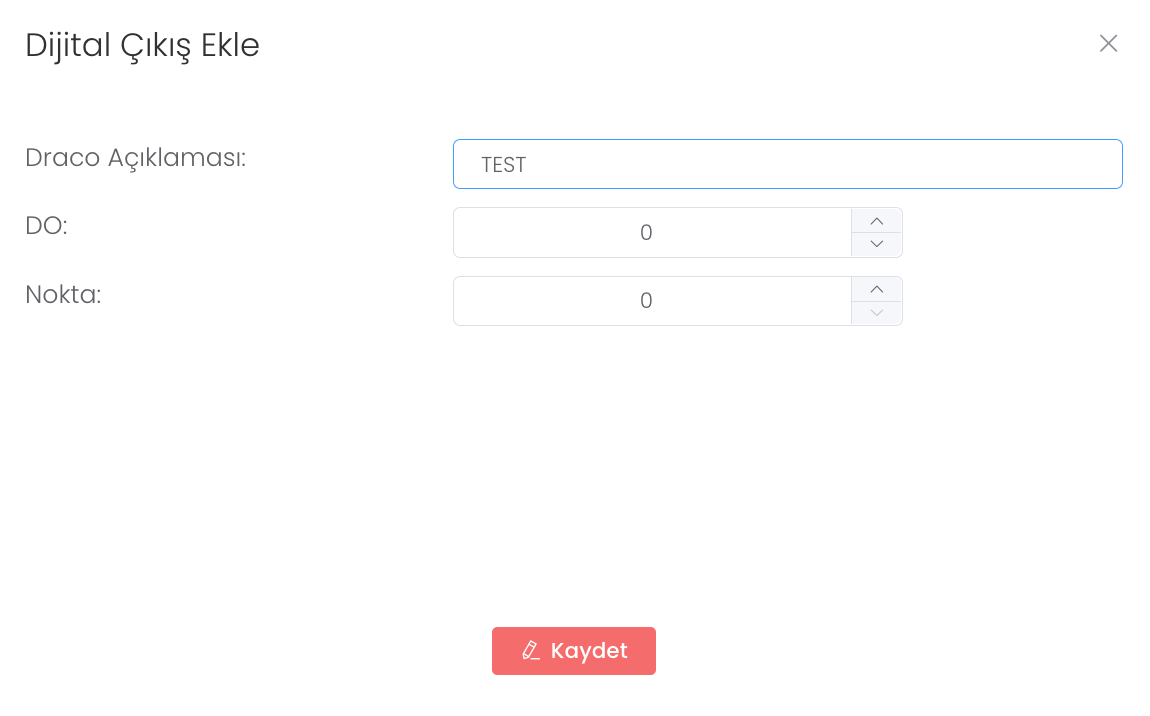
When we press the "Add" button, we come to the "Add Digital Output" panel. After entering the Description, point, DO data, press the "Save" button and you will have added a new digital draco output.
In the Analog input section, it provides a structure that we can edit if we follow the value, point and status of the inputs we set and click on it.

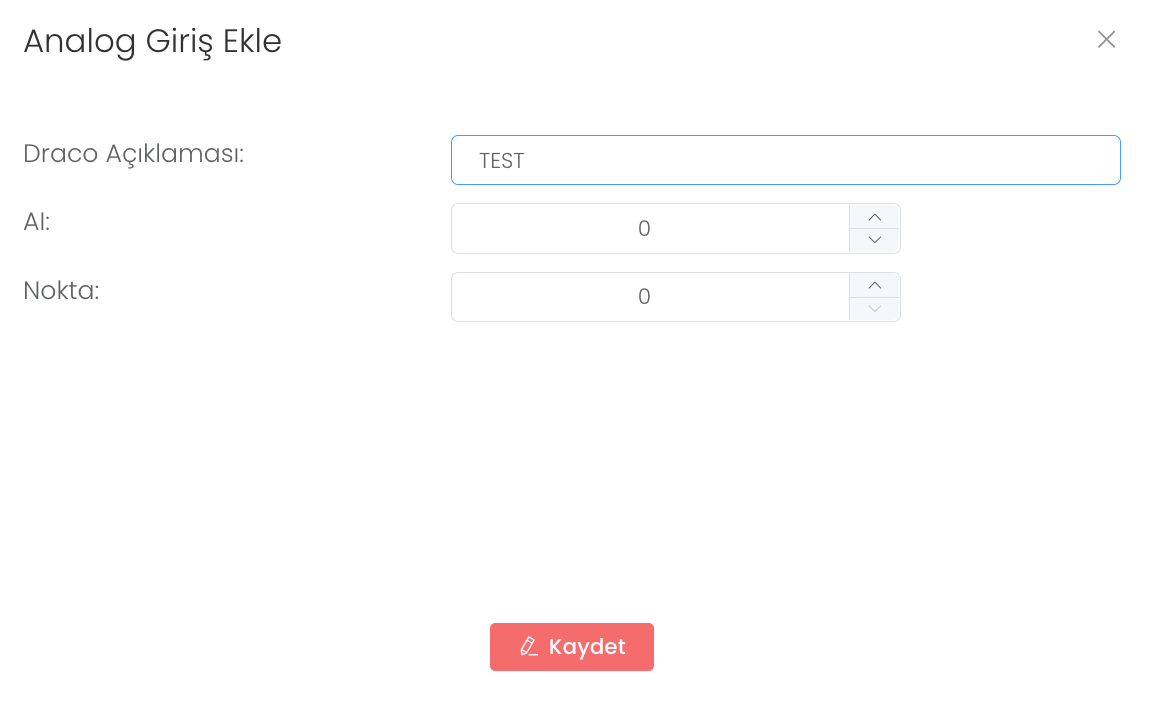
When we press the "Add" button, we come to the "Add Analogue Input" panel. After entering the Description, point, AI data, when you press the "Save" button, you will have added a new Analogue draco input.
It provides a structure that we can follow the value, point and status of the inputs we set in the Analog output section and edit them if we click on them.
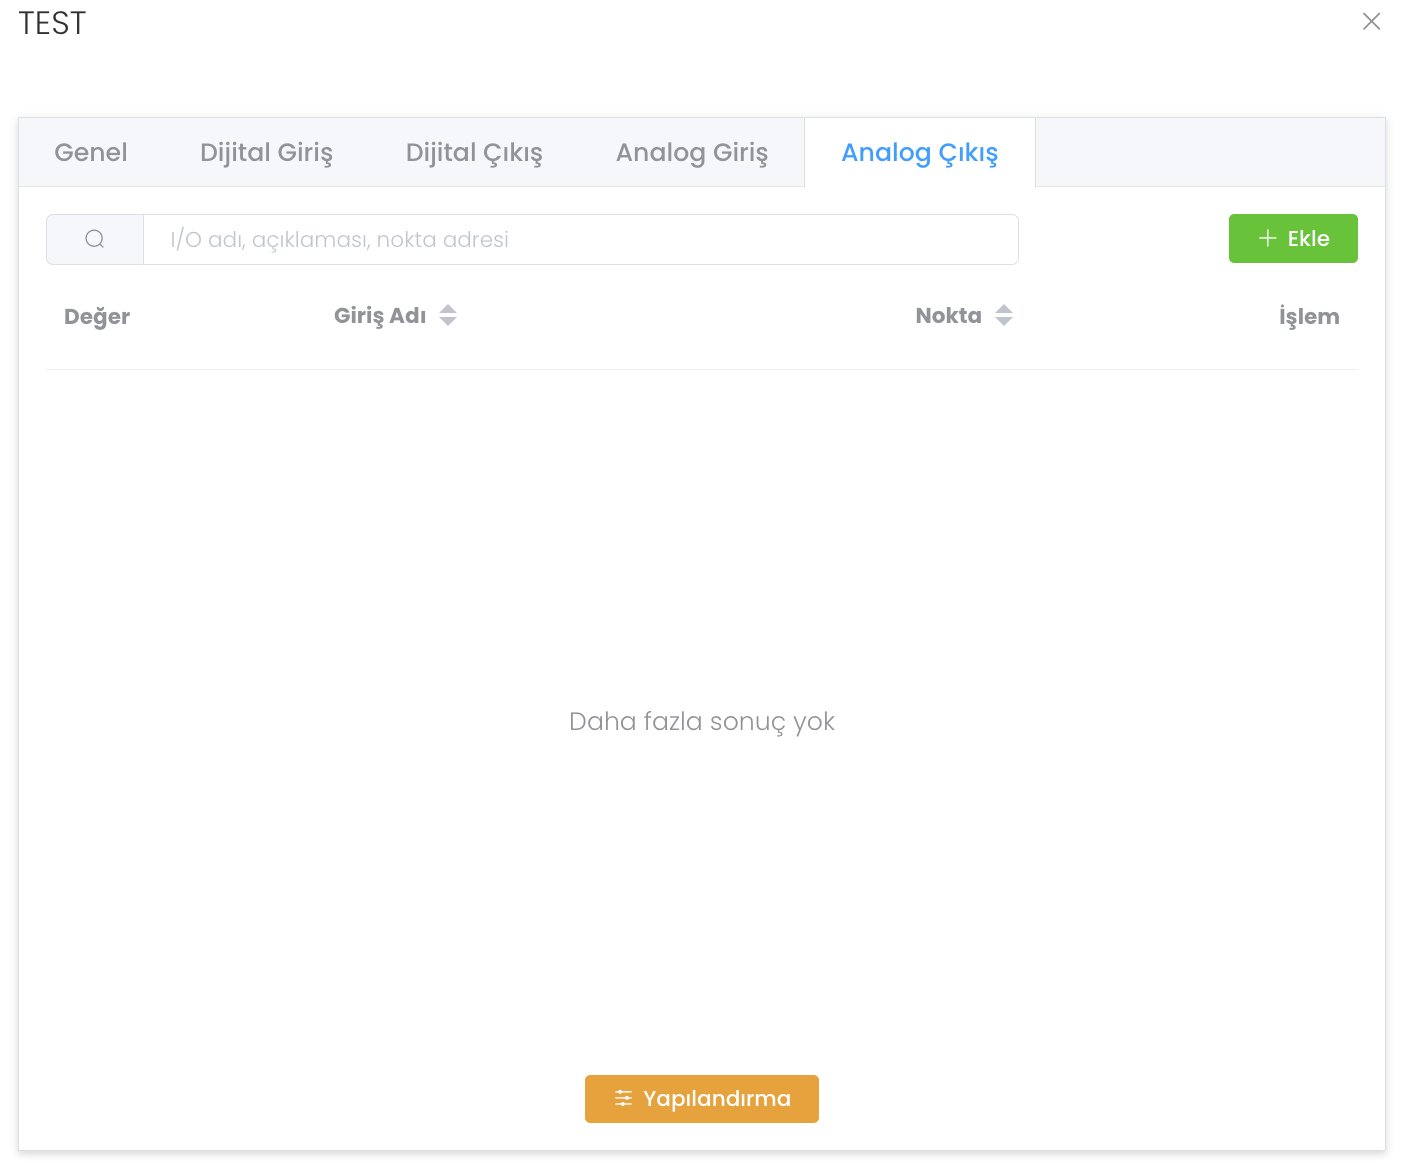
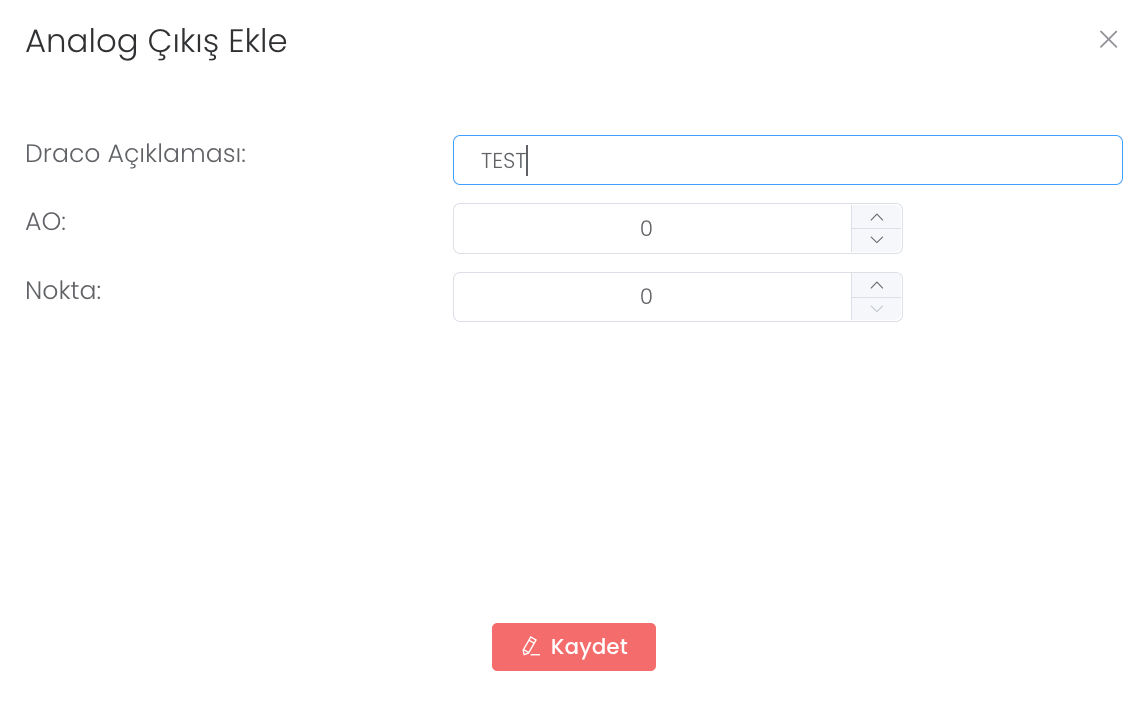
When we press the "Add" button, we come to the "Add Analogue Output" panel. After entering the Description, point, AO data, when you press the "Save" button, you will have added a new Analogue draco output.
Let's come to this configuration button that you see from General to Analog Output.
When you click on the Configuration button, you will see the configuration data of whichever dracode you are in at the moment, and you can click on the Copy or Synchronise button with this data.
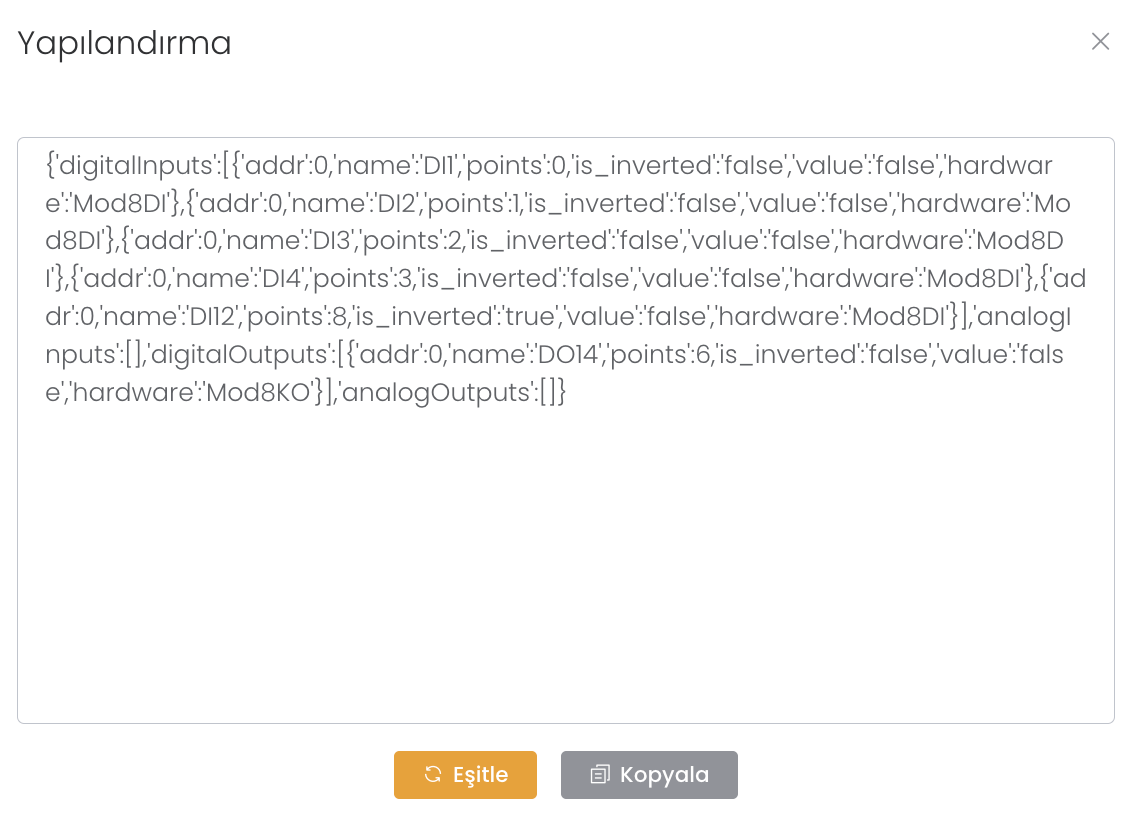
When we press the "Synchronise" button, it informs us that the device will be restarted. If you confirm, the device will be rebooted and configured.